Friday, December 14, 2012

Planetside 2 newbie guide

704
Planetside 2 is a great game, but there is no official documentation, and there were a few things that were unclear to me when I first started playing the game, so I thought I'd share my findings:

Capturing bases

Each base has capture points that you can see on the map and your display as letters (A, B, C, etc). To capture a capture point, just stand close to it until it turns your empire's color. Then a meter will show up with the enemy's color which will gradually go down, followed by one with your color which will gradually go up, and then you've captured the base. The enemy can reverse this process by recapturing the capture points.

Generators

Main bases (bio labs, tech plants, amp stations) have generators that power the shields. There is also a special unit called an SCU (Spawn Control Unit) that determines whether or not you can spawn at a base.
  • Overloading (destroying) enemy generators
    To overload an enemy base's generator, just stand near it and hold the E key when prompted. No special items or certs are required. And no, shooting at them won't do anything (common newbie mistake).
  • Repairing generators
    Once an enemy base has been captured, you can repair any destroyed generators. This must be done by an engineer using the nano armor kit (which can also be used to repair vehicles, turrets, and MAXes).

Hacking enemy terminals/turrets

Only the infiltrator class can hack enemy terminals. Hacking terminals doesn't require any special items or certs. An infiltrator can simply approach an enemy's terminal and hold the E key when prompted to hack it so that it can be used by that person's empire. The same goes for enemy turrets--pretty cool, huh? In addition, if an enemy is in a turret when you hack it, they will get kicked out once the hack is complete.

Deploying spawn beacons

If you are a squad leader, you can get the Spawn Beacon cert which will give you an extra item in your inventory (it will be the last item) that can be used to deploy a spawn beacon where your squad members can spawn.

Certs and cert points

  • Offline cert points
    Cert points will be accumulated even when you aren't playing the game. Currently about one cert point is acquired every two hours when offline, up to a current maximum of 12 cert points.
  • Auto granted certs
    Some of your certs will show up as "Auto Granted." It seems there are some certs that have a cost of 0 cert points, and you're given them automatically. My guess is maybe these certs used to cost something but they repriced them as they've been modifying the game during beta.

Spotting enemies

If you see an enemy, you can spot them out by placing your crosshairs over them and pressing the Q key (it may help to press it repeatedly). You will call out to friendly troops that an enemy has been spotted, and you may get some XP if someone from your empire kills that enemy soon afterward.

Deploying a sunderer

By default, you cannot deploy a sunderer. You must first get the Sunderer Advanced Mobile Station (S-AMS) cert, and then add the S-AMS attachment to your sunderer before spawning it. Then you can deploy the sunderer while sitting in the front seat by pressing the B key.

You cannot deploy a sunderer within 200m of another deployed friendly sunderer.

Special abilities

Most classes have special abilities that can be activated.
  • Infiltrator
    Infiltrators can temporarily become invisible by pressing the ability key (F).
  • Light assault
    Light assaults have jump-jets that can be activated by holding down the jump key (spacebar).
  • Medic
    Medics have an ability that heals people in the nearby vicinity that is activated by pressing the ability key (F).
  • Heavy Assault
    Heavy Assaults have a special shield that can be activated by pressing the ability key (F).
  • MAX
    MAXes can charge forward a short distance by pressing the ability key (F).

Third-person vehicle view

The default key for third-person view when in a vehicle is T. You may not be able to switch to third-person view immediately after spawning; wait a few seconds and try again.

Thursday, November 15, 2012

Elementary luna beta1 non PAE live CD

I booted up the elementary luna beta1 live CD today, only to be greeted by this error:

This kernel requires the following features not present on the CPU:
pae

Unable to boot - please use a kernel appropriate for your CPU.


After fumbling around for a while, I was finally able to make my own non-PAE image. I'm not sure how well it will work for others, because the installation itself seems to install a PAE kernel, but it worked fine on my machine that was giving me the above error and doesn't support PAE (at least according to cat /proc/cpuinfo | grep -i pae). Here's the link:

http://uploading.com/files/get/f5cdcc7c/elementaryos-beta1-i386-nonpae.20121114.iso

If there's a better site to upload it to, let me know. I'd put it in dropbox but there's a daily bandwidth limit, and I don't want my account flagged for abuse.

Wednesday, November 14, 2012

Elementary luna beta1 is here!


Elementary linux luna beta1 is finally here!:

Hello, Luna Beta 1

Don't know what elementary is? It's linux with a crisp, clean, and consistent UI (user interface) and a unified UX (user experience). It's basically everything linux should be. Read more about it at the link above, or you can check out some of my posts on elementary:

http://bmaupin.wordpress.com/tag/elementary/

Now stop reading this and go download it!

Tuesday, November 6, 2012

OpenLDAP mdb backend ready for production

OpenLDAP's new memory-mapped backend, mdb, is ready for production. It was first introducted over a year ago, and since then, the OpenLDAP developers (Howard Chu in particular) have put quite a bit of work into getting all of the bugs worked out.

The OpenLDAP mailing lists report that several companies are deploying it in production:
http://www.openldap.org/lists/openldap-technical/201208/msg00137.html

The latest version of email/collaboration software Zimbra uses the mdb backend as well:
http://wiki.zimbra.com/wiki/OpenLDAP_Tuning_Keys_8.0#OpenLDAP_Tuning_Keys

All of this leads me to believe it's production-ready. I've been running it myself at my own job for a couple weeks now, and it's actually lived up to the hype. It really is faster, uses less memory, and is way easier to configure. You can read more about the advantages of mdb here: Coming soon: memory-mapped db for OpenLDAP

Here's a short list of what I would consider the caveats:
  • Since it's new technology, I highly recommend compiling the latest version of OpenLDAP (as of this posting 2.4.33) to get the latest bug fixes and performance improvements. I have a page of useful tips for compiling OpenLDAP to get the most out of it here: compiling OpenLDAP.

  • Write performance is still being optimized. My personal recommendation would be to continue to use hdb on the master server (properly optimized), and mdb on the replica servers.

  • I'm guessing because of the previous point, it can take quite a bit longer to do the initial database load. Using hdb it took a few hours to slapadd our database, but it's taking around 12 hours to slapadd it using mdb. It's worth the wait, though.
    (see comments)
I've updated my wiki on optimizing OpenLDAP with instructions for mdb. Instead of worrying about locks and three different levels of caches, there's just one important option which is trivial to configure:
Optimizing OpenLDAP

More information about mdb is available here:
http://highlandsun.com/hyc/mdb/

Now, if Symas would only post some updated benchmarks, I could point to just how much faster OpenLDAP is than the competition...

Wednesday, October 24, 2012

sudo -s on RHEL 6 doesn't preserve HOME

Solution:

If you're the only one using this machine, the easiest fix is to run this command as root:
visudo

and then add this line to the sudoers file:
Defaults env_keep=HOME

If this is a shared computer and you aren't at liberty to change the sudoers file, you can add this code to .bashrc in your home directory. be sure to log out and back in for it to take effect:

# hack to preserve home when using sudo -s on rhel 6
if [[ `cat /etc/*release | grep "release 6"` ]]; then
    sudo() {
        if [[ $@ == "-s" ]]; then
            sudo bash -c "HOME=$HOME; exec bash"
        else
            command sudo "$@";
        fi;
    }
fi;


Details:

In linux, if I want to become root but keep my user's environment (home, aliases, etc), I normally use sudo -s:
[user@computer ~]$ sudo -s
[root@computer ~]# echo $HOME
/home/user


and if I want to become root and use root's environment, I'll use sudo -i:
[user@computer ~]$ sudo -i
[root@computer ~]# echo $HOME
/root


The above works on Ubuntu, and all versions of RHEL up to 5 (the same probably goes for CentOS). however, I recently noticed that RHEL 6 , my home variable isn't preserved when using sudo -s:
[user@computer ~]$ sudo -s
[root@computer user]# echo $HOME
/root


The most frustrating thing is that because of this, it seems like my .bashrc wasn't being called, and so I didn't have access to my aliases any more.

It seems like the cause of this is that the default in RHEL 6 is not to preserve the home variable. you can see this running this command as root:
sudo -V

If you look under the list of "Environment variables to preserve," you'll notice that in RHEL 5 HOME is listed, but in RHEL 6 it isn't.

Wednesday, October 10, 2012

uninstalling problematic rpms

if you're unable to uninstall an rpm using yum erase/remove or rpm -e because something in the rpm's uninstallation process is broken, try using rpm -e with the --noscripts --notriggers flags:

$ sudo rpm -e sblim-sfcb
/var/tmp/rpm-tmp.54035: line 7: /etc/init.d/sfcb: No such file or directory
error: %preun(sblim-sfcb-1.3.11-0.7.14.x86_64) scriptlet failed, exit status 127
$ sudo yum remove sblim-sfcb
...
Running Transaction
/var/tmp/rpm-tmp.49575: line 7: /etc/init.d/sfcb: No such file or directory

Removed:
sblim-sfcb.x86_64 0:1.3.11-0.7.14

Complete!
$ rpm -qa sblim-sfcb
sblim-sfcb-1.3.11-0.7.14
$ sudo rpm -e sblim-sfcb --noscripts --notriggers
$ rpm -qa sblim-sfcb
$

Tuesday, September 11, 2012

Export playlists from Google Play Music


After some brief googling, I was unable to find out a way to export playlists from Google Play Music, so I just figured it out for myself.

In order to do this, your Android device must be rooted, otherwise you won't have access to the music database file where the playlists are stored.

If you don't have an Android device, there's a chance you could use the android emulator from the Android SDK. You'd have to find an .apk file for the Google Play Music app, which shouldn't be too hard.

  1. First, make sure all of your tracks and playlists are synced with Google's servers:
    1. Install the Google Play Music app on the Android device. If it's already installed, open up the Google Play Store app, go to Menu --> My apps, and if it's in the list of updates, update it.

    2. Connect your Android device to the internet (data or wifi)

    3. Open the Google Play Music app

    4. This step will probably change as Google continues to update the app, but essentially you want it to show all of your music in the cloud and refresh it. The current way to do this is:

      At the top left of the app, make sure it says All music. If it says On device, tap it and change it to All music. Click Menu --> Refresh

    5. Wait for all of the tracks and playlists to sync (you should be able to see all of your playlists and music in the app)

    6. Exit the Google Play Music app by pressing the back button

  2. Next, you need to get the music database file from the Android device. The file is located at /data/data/com.google.android.music/databases/music.db. There are several ways to do this:

    • You can use a file manager app, browse to the file, copy it to your SD card, then plug the phone into your computer and copy it from there. Whichever file manager app you use, it needs root access. I'm currently using File Explorer by NextApp with the Root Add-On.

    • Using a file manager app, browse to the file and send it to yourself using whatever method is easiest for you (email, Dropbox, etc.).

    • As an Android developer, because I already have the Android SDK installed, my preferred method is to transfer the file using the Android SDK Platform Tools over the command line.

  3. Open the music.db file with your favorite SQLite database client (I prefer Sqliteman) to get the playlist data, using this query:

  4. select name as "Playlist Name", artist, title from listitems join music on listitems.musicid = music.id join lists on listitems.listid = lists.id order by "Playlist Name";

    From there you can export the data to a friendly format, such as a CSV file. To do a quick dump of the data from a Linux/Mac terminal, you can run this command:

    sqlite3 music.db 'select name as "Playlist Name", artist, title from listitems join music on listitems.musicid = music.id join lists on listitems.listid = lists.id order by "Playlist Name"' > playlists.txt

There are a lot of other columns available, such as album. to get the full list, just replace everything in the query from select to from with *, i.e. select * from listitems...

Enjoy!

Tuesday, August 28, 2012

Android: can't upgrade read-only database from version 0 to 1

Solution:

If you have named one of your SQLite tables "default", change the name to something else.

Details:

So I was poking around with Android programming the other day, and I ran into this error:

04-12 14:35:09.779: ERROR/AndroidRuntime(790): Caused by: android.database.sqlite.SQLiteException: Can't upgrade read-only database from version 0 to 1: /data/data/com.example.test/databases/mydatabase.db
04-12 14:35:09.779: ERROR/AndroidRuntime(790): at android.database.sqlite.SQLiteOpenHelper.getReadableDatabase(SQLiteOpenHelper.java:170)


The line causing the error was simply calling SQLiteOpenHelper.getReadableDatabase():

SQLiteDatabase db = dbHelper.getReadableDatabase();

I finally narrowed it down to the database table name I was using: "default". As soon as I changed the table name, it worked fine. In fact, I simply changed it from "default" to "default1".

Just to be clear, I wasn't doing anything fancy. I was using pretty basic code to create the database:

public class DatabaseHelper extends SQLiteOpenHelper {
    public static final String DB_TABLE_NAME = "default";
    ...
    public static final String DB_TABLE_CREATE =
        "CREATE TABLE " + DB_TABLE_NAME...


It doesn't appear to be a SQLite thing, because according to their documentation the only reserved table names begin with "sqlite_". So it appears to be an Android issue, and as far as I can tell it isn't documented.

I checked the database after I changed the name, and the "default" table was never created either, so I'm not sure why it wouldn't work:

sqlite> .tables
android_metadata default1


A bug, perhaps?

Thursday, August 23, 2012

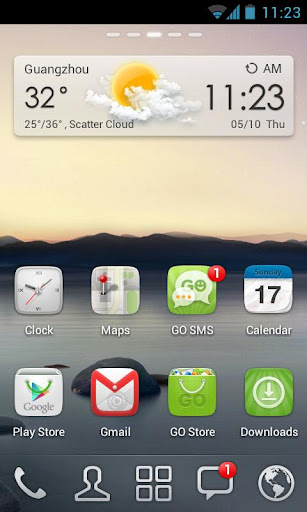
GO Launcher EX: a great LauncherPro replacement


I've been using LauncherPro for my android launcher/home screen for a while. I was quite happy with it at first, but I've been gradually growing less pleased with it:
  • It hangs/crashes every time my phone first boots up

  • If I accidentally long press on one of my widgets, I get an annoying nag screen to buy the pro version

  • Over a year ago, it stopped showing my unread gmail count
Why have I still been using LauncherPro then? it has a really cool scrollable dock that allows me to put multiple rows of my most used shortcuts.

Well, byebye launcherpro. I just stumbled across GO Launcher EX, and:

Wednesday, August 22, 2012

Fix Half Life 2 lighting issues


Solution:

  • You need to be using a video card that supports DirectX 9 and the DirectX level in Half Life 2 needs to be 90 or higher. In the console, type mat_dxlevel to see the directx level. To set it to 90, for example, type mat_dxlevel 90

  • HDR needs to be fully enabled. The easiest way to do this (after correctly setting the directx level) is by typing this in the console: mat_hdr_level 2 and then type mat_hdr_enabled to make sure HDR is in fact enabled.

  • Lastly, if the lighting is still messed up, type mat_fullbright 0 in the console to fix it.

  • An alternative is to download these files:
    http://uploading.com/b84125d7/ldr_fix-exe
    http://uploading.com/3mb5mdm9/sky_fix-exe

    Open them to extract the files (in Linux, you can open them using Wine). Then copy the files to SteamApps/common/Half-Life 2/hl2/maps in your Steam installation folder (~/.local/share/Steam on Linux, or in C:/Program Files on Windows).

Details:

I was recently playing Half Life 2 on Linux using Wine, and at one point, all the lighting messed up. It basically looked like there were no shadows at all. The screenshot above is supposed to be in a dark tunnel.

Supposedly this was caused by an update to the Half Life 2 maps when the orange box was released. Somehow or another, some of the maps require HDR to be enabled for the lighting to work. HDR is only supported in DirectX 9 and higher, and I was setting the DirectX level to 80 (DirectX 8.0) by using the -dxlevel 80 flag in the launch options. I had to remove that flag, and then take the steps above to fix the problem.

Once I did fix the lighting, the game got significantly slower. Still playable, but a lot more annoying to play. Using some of my tips on playing Half Life 2 on an older computer helped, but some of the textures are messed up.  This may affect other source games as well.

Now that Half Life 2 is playable natively on Linux, this is issue will probably only affect Windows users.

Wednesday, August 15, 2012

Cross-platform mobile development: PhoneGap + Enyo


If you want to develop a mobile application, but don't want to have to rewrite it for every platform you want to develop for (Android, iOS, etc.), PhoneGap is what you want. It allows you to develop applications using web technologies (HTML, CSS, JavaScript), and then deploy them to a large number of platforms, such as Android and iOS. It has APIs that let you interface directly with the mobile device's hardware (camera, GPS, accelerometer, you name it). It's even been approved by Apple, and we all know what a feat that is ;)

Undoubtedly you'll want a nice framework that gives you all the UI widgets you're used to: layouts, spinners, popups, progress bars, etc. That's where Enyo comes in. Enyo was actually the JavaScript framework that was part of WebOS. Since WebOS has been open-sourced, so has Enyo. I would recommend Enyo over other JavaScript frameworks like jQuery Mobile and Sencha; see here for some reasons why: Enyo+PhoneGap Vs jQueryMobile+PhoneGap

There are already some apps out there using this approach. Here are a couple for android:
I've even done some playing around with phonegap and the enyo samples myself. I put it in github in case it's of any interest:
https://github.com/bmaupin/junkpile/tree/master/java/testing/android-phonegap-enyo-test

The screenshots in this post are from that code, and you can see more here:
https://github.com/bmaupin/junkpile/tree/master/java/testing/android-phonegap-enyo-test/screenshots

Enjoy!

Thursday, July 19, 2012

The evolution of Android Arabic support

Now that full Arabic support has finally been added to the latest version of Android (4.1, nicknamed Jelly Bean), here are some details as to what extent Arabic has been supported in previous versions:

up to and including Android 2.1:


No Arabic support whatsoever. Any attempt to show Arabic text will result in rectangular boxes instead of characters. Applications that wish to support Arabic must include their own Arabic font. There is no shaping support, meaning letters will not connect to each other, but this can be provided by a third-party library. In addition, the diacritics/harakat will not be properly placed and will often overlap, making them difficult to read.

Android 2.2 - Android 2.3:


In Android 2.2, an Arabic font was added (DroidSansArabic), which is the default Arabic font in Android until Android 4.0. still no shaping or diacritic support.

Android 3


With Android 3.0, shaping support is finally added, so now the Arabic letters will connect without the aid of a third-party library. Still no diacritic support.

Android 4.0


The default Arabic font is changed to Droid Naskh, and another Arabic font is added to replace DroidSansArabic: Droid Kufi. Still no diacritic support.

Android 4.1


Finally, full Arabic support, including support for diacritic placement!

Friday, July 6, 2012

Pimsleur: the best way to learn a language

First, a disclaimer: I'm not getting paid to say this. I am not affiliated with Pimsleur in any way, and there are no affiliate links here. I'm simply a huge fan of a great product.

I've used many programs to study languages, including (but not limited to):
  • Berlitz
  • Living Language
  • Rosetta Stone
  • Teach Yourself
  • VocabuLearn
Pimsleur beats them all, hands down. Here's why I recommend it to anyone wanting to learn a language:
  1. It teaches you using the same methods you used to learn your first language as a baby. So the focus is on listening and speaking, and you learn the grammar intuitively. So no more studying charts, paradigms, conjugations, etc.

  2. The repetition is built-in. With other programs, I end up having to repeat the lessons over and over. I end up getting bored and don't retain much information at all. Not so with Pimsleur.

  3. Because the focus is on listening and speaking, you actually get comfortable speaking the language. I've used other programs that help me learn how to read a language, but that does little in helping me communicate with other people. With Pimsleur, you'll be speaking from day one (literally).

  4. Let's face it, I'm busy. I don't have time to sit in front of a computer and do Rosetta Stone for hours, or study a book for hours. Pimsleur's focus on listening and speaking means I can do the lessons during my commute, at the gym, folding clothes, whatever.
So what are you waiting for? The first lesson for your language of choice is available from Pimsleur's website for free. I think they should make the second lesson available for free too, but something is better than nothing.

Where to get Pimsleur:

  • Your local library
    Many local libraries have Pimsleur available to check out for free. Can't hurt to check.

  • Used online or locally
    You might be able to find Pimsleur used on sites like ebay, amazon, or at a local used bookstore.

  • Buy the digital version from pimsleur.com
    Sometimes this can even be cheaper than a used copy of the CDs, and if you're like me and would rather listen to it on your phone/mp3 player than have to carry around a stack of CDs, it's win-win.

  • Buy the CDs new
    This is probably the most expensive option: buying the Pimsleur CDs new from pimsleur.com or another site like amazon.
If you do end up buying online, be sure to use my tip to check if there's a coupon code before you pay the full retail price!:
How to save money when shopping online

Thursday, July 5, 2012

no wifi networks showing on android


if for some reason no wifi networks are showing on your android device, first reboot it. if that doesn't do the trick, restoring your wifi access points from a previous backup may work:

  1. open Titanium Backup

  2. click Backup/Restore

  3. scroll down and select Wi-Fi Access Points

  4. click Restore next to the most recent backup

  5. reboot your phone


of course this will only work if you've already rooted your phone, installed Titanium Backup, and backed up your wifi access points. if you haven't done that, there are several apps in the google play market that claim to fix your wifi. if those don't work, you may need to a factory reset.

the moral of the story is: use Titanium Backup to back up your android device often!

Thursday, June 14, 2012

android vs iphone/ios

I just read an incredibly well-written article from the point of view of a 4-year iphone user switching to android. if you're looking for an iphone (or android) bashing, move along. this is actually a balanced article that points out the pros and cons for both. very well done:

29 Days with Android

Tuesday, June 5, 2012

Eclipse Subversive plugin out of Java heap space

Solution:

Use the JavaHL SVN Connector instead of SVN Kit. to install the JavaHL Connector:
  1. In eclipse go to Help --> Install New Software...

  2. Work with: --> choose the community.polarion.com update site

  3. Expand Subversive SVN Connectors

  4. Choose the JavaHL version corresponding with your version of subversion

  5. Click Next, and then follow the instructions to complete installation

  6. Window --> Preferences --> expand Team --> select SVN --> select the SVN Connector tab --> change the SVN Connector to JavaHL --> OK
There are additional steps for completing the JavaHL installation. Subversive doesn't seem to have any helpful documentation regarding this, but Subclipse does:
http://subclipse.tigris.org/wiki/JavaHL

In Linux (elementary, Ubuntu, Debian), you can do this to finish the installation:
  1. Install libsvn-java:
    sudo apt-get install libsvn-java

  2. Then edit eclipse.ini (located in /etc/ if you installed eclipse from a package or in the eclipse folder you extracted if you downloaded it from the eclipse website), and add the following line after the -vmargs line:
    -Djava.library.path=/usr/lib/jni

    For Ubuntu 12.04 64-bit, the line should be:
    -Djava.library.path=/usr/lib/x86_64-linux-gnu/jni/

  3. Restart Eclipse

Details:

So I recently switched to Subversive from Subclipse as my SVN plugin in Eclipse. I was checking out one of my repositories (a pretty big one), and I got this error:

Checkout operation for 'https://svn.example.com/myproject' failed.
Java heap space


I have 1 GB of java heap space given to Eclipse (-Xmx1024m in /etc/eclipse.ini), and I don't think I've run out yet, but I went ahead and upped it to 1.5 GB. I got the same error. 2 GB--same error. I tried again with 2 GB of heap space, closing all perspectives to save memory, and it finally worked.

I new something wasn't right, but at first I couldn't find anything in Google. I kept searching, and finally found this:
http://www.eclipse.org/forums/index.php?t=msg&goto=559537&S=9c09f002ceb108176748012e60540921

Essentially the problem is a bug with the SVNKit SVN connector. There are two connectors available:
  • SVNKit
    • Pros: easier to install
    • Cons: possibly buggier, because it's a Java reimplementation of Subversion
  • JavaHL
    • Pros: more stable, because it's a wrapper around the native subversion C code
    • Cons: a little more work to set up
The solution, as mentioned above, is to use the JavaHL connector, because this problem is caused by a bug in the SVNKit connector.

Friday, May 25, 2012

wine crashing on ubuntu 10.10

solution:


downgrade wine, like so:

  1. uninstall the current version of wine
    sudo apt-get remove wine1.3 wine1.3-gecko ttf-symbol-replacement-wine1.3

  2. install the older stable version of wine
    sudo apt-get install wine1.2


backstory:


I was recently trying to install steam on ubuntu 10.10 using the latest wine (1.4 something I believe). it kept crashing X windows right as it tried to launch steam.exe, or when I tried to launch it manually. here's the end of the terminal output:

err:wgl:is_extension_supported No OpenGL extensions found, check if your OpenGL setup is correct!
fixme:iphlpapi:NotifyAddrChange (Handle 0x453d95c, overlapped 0x4353d20): stub
fixme:winsock:WSALookupServiceBeginW (0x453da5c 0x00000ff0 0x453daa4) Stub!
[0525/102859:ERROR:network_change_notifier_win.cc(111)] WSALookupServiceBegin failed with: 8
fixme:toolhelp:CreateToolhelp32Snapshot Unimplemented: heap list snapshot
fixme:toolhelp:Heap32ListFirst : stub
ALSA lib pcm_pulse.c:1008:(_snd_pcm_pulse_open) Unknown field handle_underrun
err:winediag:AUDDRV_GetAudioEndpoint PulseAudio "default" -22 without handle_underrun. Audio may hang. Please upgrade to alsa_plugins >= 1.0.24
../../src/xcb_io.c:385: _XAllocID: Assertion `ret != inval_id' failed.
XIO: fatal IO error 11 (Resource temporarily unavailable) on X server ":0.0"
after 150 requests (144 known processed) with 0 events remaining.

I'm not sure which part of that caused the crash. I googled the third-to-last line, and came across this still unfixed bug that's been in ubuntu for the last four versions (please try to convince me the ubuntu developers care about stability):
https://bugs.launchpad.net/ubuntu/+source/libx11/+bug/507062

after I downgraded wine (see solution above), steam installed just fine:
winetricks steam

if, for some reason, you removed the wine PPA or need to install winetricks manually, this should do the trick:

cd /usr/local/bin
sudo wget http://winetricks.org/winetricks
sudo chmod +x winetricks
cd ~

Thursday, May 17, 2012

Playing Half Life 2 on an old/slow computer

I wanted to play Half Life 2 on an old laptop with Intel GMA 900 graphics (910GML/915GM chipset), but with the default settings the game would often become unbearably slow. So after doing some googling and lots of testing, I found some settings that seem to work.

  1. First, create a text file named autoexec.cfg and place it in the hl2/cfg folder. Give it the following contents:

    // see http://www.tweakguides.com/HL2_8.html for more information
    // also see https://developer.valvesoftware.com/wiki/List_of_HL2_Cvars

    // ***** major stuff *****
    mat_compressedtextures 1
    mat_forcemanagedtextureintohardware 0
    mat_softwarelighting 0
    // in pixels
    //r_decal_cullsize
    // specific number
    //r_decals
    // level of detail at a distance: -8 to 8
    //r_lod

    // ***** minor stuff *****
    cl_ejectbrass 0
    cl_show_splashes 0
    dsp_slow_cpu 1
    mat_bumpmap 0
    mat_dxlevel 70
    muzzleflash_light 0
    r_drawflecks 0
    r_waterforceexpensive 0
    sv_robust_explosions 0
    violence_ablood 0
    violence_agibs 0
    violence_hblood 0
    violence_hgibs 0

    // these are newer source 2007-based variables and may be unrecognized by older
    // versions of half life 2
    ai_expression_optimization 1
    mem_max_heapsize 768

  2. In your shortcut that you use to launch Half Life 2, add the following parameters:
    -novid -window -dxlevel 60 -heapsize 786432 -console

    The end result will look something like this:
    "C:\Program Files\Games\Half-Life 2\hl2.exe" -novid -window -dxlevel 60 -heapsize 786432 -console

  3. (Optional) Create valve.rc in the hl2/cfg folder, or edit the one that already exists, and make sure the startupmenu line is commented out by ensuring there are two slashes (//) in front of it.

  4. Lastly, read this article to get more information on what these tweaks mean and how to customize them for your system:
    http://www.tweakguides.com/HL2_1.html
If you're playing on a machine with integrated Intel graphics, GMABooster may help some as well.

Monday, April 30, 2012

my next OS: elementary


as ubuntu 12.04 brings yet another buggy release (see the comments here), I'm all the more excited about elementary's upcoming Luna release.

elementary, for those of you who don't already know, is everything linux (and any operating system) should be. it's crisp, clean, and most importantly, consistent! the team at elementary have created a desktop environment and suite of applications that adhere to a common set of interface guidelines. it's evident they care more about a great UX and UI than cramming more bells and whistles into an already inconsistent and unstable UI (ubuntu's unity).

for those of you suffering through another buggy ubuntu release with the lackluster unity desktop environment, I highly recommend elementary.

less is more.

Friday, April 27, 2012

Powerbook G4 not enough disk space

Solution:

Set the date and time.

Details:

So I had an old Powerbook G4 lying around that someone had given me. I hadn't used it in a while, and I turned it on, plugged a USB drive in, and tried to copy some files. I got an error message saying there wasn't enough disk space. Strange, as there was plenty of space, on the hard drive and the USB drive. I ctrl-clicked on the hard drive, clicked get info, and the space wasn't even reporting. Even more strange.

Well... turns out it was the fault of my own laziness. When I first booted the laptop, it said that the date had been reset, probably because the CMOS battery was dead. The error said that I'd probably have problems until I fixed the date, but hey, I just wanted to copy some files off, nothing serious.

Well, while I was putzing around, I decided to go ahead and set the date and time. Lo and behold, my problem went away. If I hadn't been so lazy and paid more attention to the error message I wouldn't have had the problem in the first place. Lesson learned? We'll see... :)

Thursday, April 19, 2012

problems overriding android compatibility methods

I had a class that extended android.support.v4.app.FragmentActivity. I wanted to override onRetainCustomNonConfigurationInstance, and I ran into the following error, indicating FragmentActivity didn't have that method:

The method onRetainCustomNonConfigurationInstance() of type ... must override or implement a supertype method


here's how to fix it:

  1. open the android SDK manager


  2. update the compatibility package


  3. copy the updated compatibility package to the /libs folder of your project. see here for where to find the compatibility package: http://developer.android.com/sdk/compatibility-library.html#SettingUp


that last part's what got me; I assumed updating the compatibility package would update it in my project :P

Wednesday, February 29, 2012

Playing old-school adventure games on Android


Did you know you can play many of the old-school point-and-click adventure games on your Android device? Here's how:

  1. Install the ScummVM app

  2. Check compatibility
    In the game compatibility list, pick a game you want to play, and make sure it's compatible. Be sure to click on the game and read the compatibility notes.

  3. Install the game engine
    Go to the list of game engines, find the game you want to play, and then find the engine it needs. Then go to the Google Play Store and install the correct plugin for that engine.

  4. Get the game data files
    Find your game in the data files list, and make note of the data files it needs. You need to get those data files from your copy of the game (install the game if necessary), and then put these files somewhere on the SD card of your phone.

  5. Add the game to ScummVM
    On your phone, open ScummVM, then click Add Game. Browse to the folder where you put the data files, highlight the folder, and click Choose
A few games, such as Beneath a Steel Sky and Flight of the Amazon Queen have even been released as freeware. See here on where you can get them. Here's what the above steps would look like for one of the free games, Teen Agent:

  1. Install ScummVM

  2. Install the teenagent engine plugin

  3. Download Teen Agent from GOG

  4. Install Teen Agent (if you're using Linux this works fine in Wine)

  5. Go to the Teen Agent installation folder, and copy all the *.res files somewhere to your Android device's storage/SD card

  6. Get the teenagent.dat file (which was mentioned in the compatibility notes for this game) and put it in the same folder where you put the *.res files

  7. On your phone, open ScummVM, then click Add Game. Browse to the folder where you put the Teen Agent files, highlight the folder, and click Choose.
In case you're curious, I haven't actually found Teen Agent to be very fun. In particular, the English translation isn't that great (the original game was Polish, I believe) and the puzzles are somewhat difficult because many of them aren't very intuitive; many of the solutions simply don't make much sense. I chose it intentionally as my example, though, because it's important to check out the compatibility notes for any quirks, like the teenagent.dat file in this case.

You might also find these links helpful in using ScummVM on Android:
Enjoy!

Friday, February 10, 2012

Free resources for learning Python

I've blogged on here a bit about Python, but it occurred to me that I haven't actually provided any resources for anyone interested in learning Python.

A great place to start is learnpython.org. It's got simple tutorials as well as an interactive shell so you can try it out as you learn.

There's also Dive Into Python, a free book that's also been published by Apress.

Dive Into Python covers Python 2, but there's a Python 3 version available as well for free, published by Apress as well.

Of course there are a lot of other free resources available, but less is more, and these two are a great place to start. A more comprehensive list of resources, free and non-free, are available here: http://wiki.python.org/moin/PythonBooks

Have fun!

Monday, February 6, 2012

Friday, January 27, 2012

offline android development

if you ever find yourself with time on your hands and no internet (maybe waiting at the airport and like me, too cheap to pay $5 for a measly couple hours of internet), have no fear, you can still do android development. but you'll have to plan ahead, and set up a few things while you do have internet:

  • git
    so we all know git is a great, super-fast way to keep track of revisions in a decentralized way. because it's decentralized, you can commit changes to a git repository without any internet access. just make commits as you normally would, and then the next time you have internet you can push them to a remote repository like github.
    if you won't have internet access on your development machine, you can still update a remote repository by using a flash or other external drive:


    1. plug in your flash drive, and change to a directory where you wish to store a clone of your git repository:
      cd /media/my-flash-drive/some-folder


    2. clone your repository onto the flash drive:
      git clone git://example.com/myrepo.git


    3. now that you've got a clone of the repository, next time you're developing offline, you can pull local changes into the clone of the repository on your flash drive, like so:
      cd /media/my-flash-drive/some-folder
      git pull /home/myuser/path/to/repo


      if it gives you an error about specifying a branch, try tagging "master" to the end of the command, like so:
      git pull /home/myuser/path/to/repo master


    4. then, next time you're online, plug your flash drive in, and push the repo to your remote repository:
      cd /media/my-flash-drive/some-folder
      git push -u origin master


    I've got some basic git documentation on my wiki, but github's got better documentation on their help site.


  • android developer documentation
    unless you've got the android developer documentation memorized, you might find it handy to be able to access it offline. this one's really easy if you've followed their instructions on setting up the android SDK:


    1. open the android SDK manager using the instructions here: http://developer.android.com/sdk/adding-components.html#launching


    2. expand the latest version of the android API, underneath it check the Documentation for Android SDK, click Install, and follow the instructions.


    3. when it's finished installing, using a web browser navigate to the docs folder in the folder you installed the SDK, and open offline.html. the cool thing is that search works, even offline!


of course you'll need to have the SDK installed as well, but I don't mention that here because you kinda need to have that installed anyway.


have fun!

Thursday, January 19, 2012

Why Linux?

Let's be honest, sometimes when I'm using Linux I get pretty frustrated. Especially with distributions like Ubuntu who have been focusing so much on new bells and whistles that they've been lackadaisical when it comes to fixing bugs.

...and then I have to use Windows for something or other (normally gaming), and I'm reminded why I use Linux in the first place. So I thought I'd write down some of the advantages, for myself, if nothing else:

  • No more viruses! (or spyware)
    Not only do you not have viruses in Linux, an even bigger advantage in my opinion is that you're not dedicating gobs of processor and memory to antivirus/antispyware software. This is all the more important on older/slower computers.

  • It's free!
    Free as in you can see the source code and modify it however you like, as well as free as in cost, Which you'll remember next time you have to purchase a retail copy of any Microsoft software. Which brings me to my next point...

  • No more licenses/activation!
    Have you ever tried installing Windows and the key wouldn't work because it was a Dell key with OEM media? Or installed office only to discover you've misplaced your key? Since Linux itself as well as most Linux software is free, so no licenses to fuss with!

  • Less rebooting
    Not much needs to be said about the ridiculousness of having to reboot a "modern" operating system (windows) every time it's updated. With Linux, you only need to reboot when updating the kernel. And even then, it doesn't nag you every 15 minutes to reboot.

  • More security
    Linux gets security patches every day, not once a month like Windows.

  • No more startup cramming
    Windows computers gradually get slower the longer you use them, because half of the programs you install (Adobe Reader, Office, iTunes, even Google software) decide they want to run at startup. Not so with Linux.

  • Less use of system resources
    Unlike the latest version of Windows, the latest versions of Linux will actually run on old computers, especially if you use a lightweight desktop environment like Xfce, LXDE, or Enlightenment.

  • Easier software acquisition/updates
    Want to install software in Linux? Almost everything you need is simply an apt-get (or yum) away! This includes codecs, which can be annoying to hunt down in Windows. Software is also automatically updated via the centralized package manager.

  • Easier development
    Everything you need for development is available through a package manager as well (C compiler, JRE, git, etc.). Python? Already comes with Linux. Plus, development software integrates much better in Linux because the terminal isn't just an afterthought like it is in Windows.

  • Automation
    This is more important for servers than for desktops, but every single task in Linux can be automated with free software (Python, shell scripting, Puppet...).

  • Nicer font rendering
    With windows 7, Microsoft is finally starting to catch up, but Linux has had much nicer font rendering for a long time now.
Next time I'm annoyed with Linux I can look at my list and remember life could be worse--I could be using Windows ;)

Monday, January 9, 2012

Using LIMIT with android ContentProvider

So you're using a content provider in your android app, and you want to supply a LIMIT parameter. The problem is, ContentProvider's query method doesn't have a limit parameter. Well, fortunately there's an easy solution; put the limit into a query parameter:
  1. First, in your content provider, create a constant for the query parameter key:
    public class MyProvider extends ContentProvider {
        public static final String QUERY_PARAMETER_LIMIT = "limit";

  2. In the query method of your content provider, get the limit from the Uri:
    public Cursor query(...
        String limit = uri.getQueryParameter(QUERY_PARAMETER_LIMIT);

  3. Still in the query method of your content provider, you can pass the limit on when creating the cursor:
    SQLiteQueryBuilder qb = new SQLiteQueryBuilder();
    Cursor c = qb.query(db, projection, selection, selectionArgs, null, null, sortOrder, limit);

  4. Lastly, when calling your content provider (via getContentResolver.query(), a CursorLoader, etc), you can append the limit to the content uri like so:
    String someLimit = "15";
    cursor = getContentResolver().query(
        // add the limit to the content uri
        MyProvider.CONTENT_URI.buildUpon().appendQueryParameter(
            MyProvider.QUERY_PARAMETER_LIMIT,
            someLimit).build(),
            ...
The cool thing is you can use this same technique to pass other parameters to your query, like DISTINCT, for instance.